Creating a scaled floorplan with Inkscape for use in TrackLab
Last updated: Aug 24, 2026
Use Inkscape to create a scaled floorplan for use in TrackLab.
- Download the latest version here: https://inkscape.org/
- Install the application by using default installation options
- Start Inkscape
- Create a new document to represent the floorplan. Note that it will create a default sized one
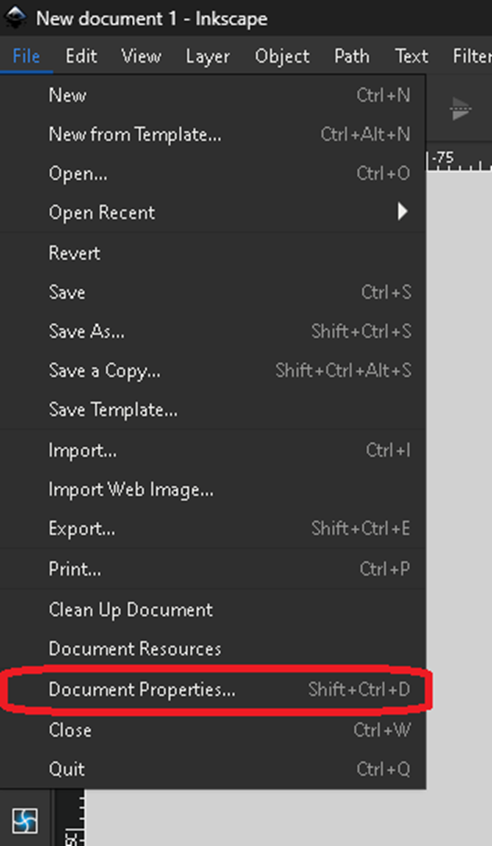
- Go to File - Document Properties…
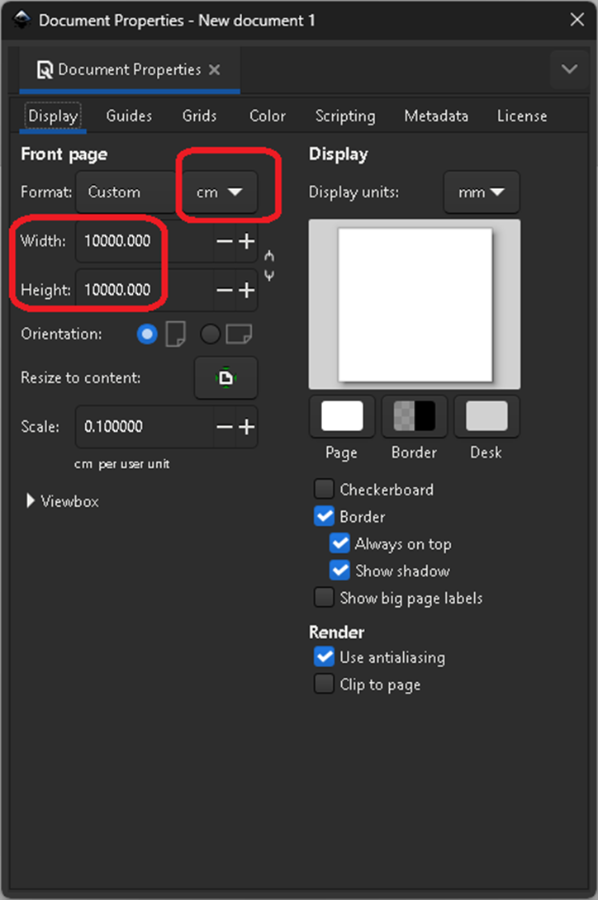
- Set the size of the document in centimeters (example below defines document real-world dimensions as 100x100 meters, but you can set the dimensions to anything that matches your situation)
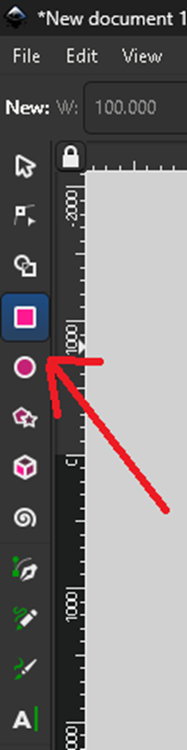
- Select a geometry to start drawing the floorplan. In general, a rectangular shape representing the actual room/tracking area. Add additional geometries to represent other details in the tracking area
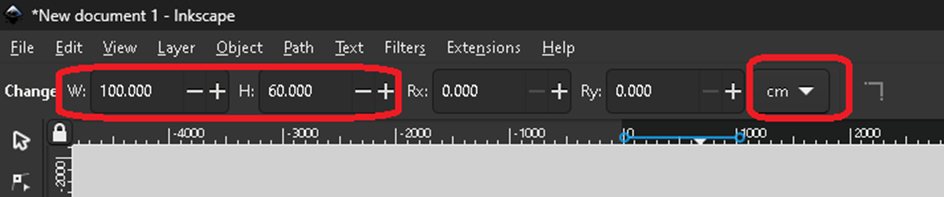
- To set the real-world dimensions of a geometry, select the drawn geometry and adjust the size. Set the unit to centimeters first, next change the width and height of the object
- Once finished, export the floorplan. Go to File - Export…
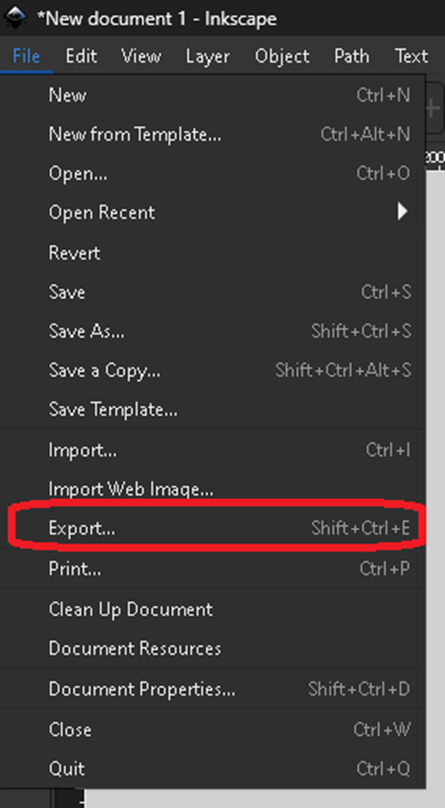
- Set the parameters for the exported file:
- the width and height of the exported file in pixels. Note that the larger the real-world dimensions of the document, the larger the default dimensions for the exported image will be. In our example a document that is defined to be 100x100 meters will have an image size of ~378Kx378K pixels, which will take an enormous time to export. Therefore set the image size to something reasonable like for example 1920x1080 pixels
- the filename for the exported file
- choose the file format (default: PNG)
- the background of the file (default: transparent/black)
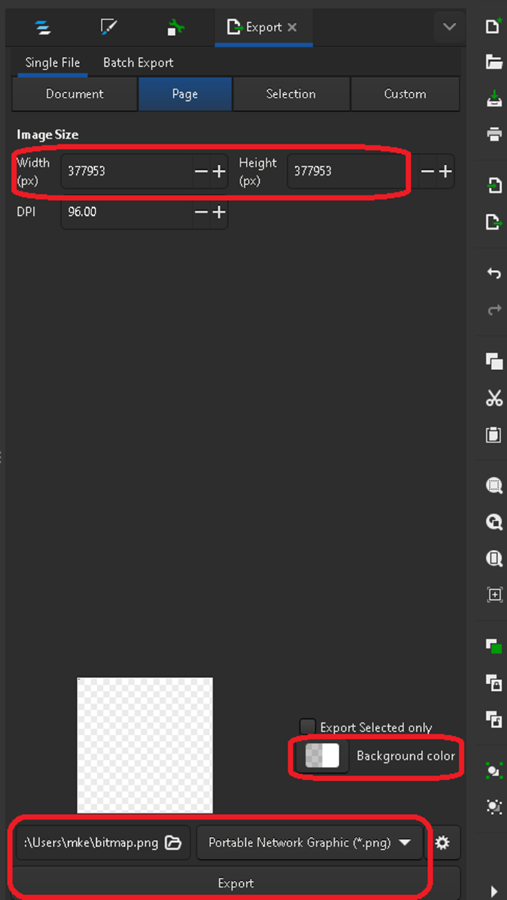
- Press the button “Export” to export the floorplan